Introduction
WP_Mock: ( https://github.com/10up/wp_mock ) is an API mocking framework that can be used for unit testing WordPress Plugins. This tutorial is a complete beginner guide to add and integrate WP_Mock mocking framework to your WordPress Plugin. WP_Mock uses Mockery PHP mock object framework for unit testing WordPress plugins. This is how to properly implement unit test inside WordPress plugins and can be considered as one of the best practices. If you are already familiar with mocking and unit testing, you can skip the introduction below and proceed directly to requirements and steps section.
Below are some introduction for beginners:
- It allows developer to “mock” test data, objects, properties, classes and methods to be used during the testing. In short, you don’t need to rely on the WordPress core environment to be loaded just test your plugin. This minimize test time, complexity and improve efficiency of your tests. Other synonyms of “mock” as used with testing includes “fake”, “staged”, “planned” or “simulate”.
- Since there is no loading of WordPress environment during this testing. It does not actually use real database or actual
$wpdbobject methods to read and transact testing data from database tables. Again this is mocked or simulated when usingWP_Mockand Mockery. - All WordPress core functions are mocked as well. A common example is if you are getting post from a database using
get_post()or retrieving users usingget_users(). You are not actually calling these functions since WordPress is not loaded when usingWP_Mock. You define and set this in advance before actually calling one of your plugin method that you need to test. - Since dependencies are mocked except with the method you are testing, you can be confident that the test pass or fail entirely depends on the “unit” being tested and not with the other dependencies.
This tutorial works best with a Linux environment such as Ubuntu. Also it assumes you will be using GitHub as your code repository manager to store your plugin. Although concepts can be applied to other UNIX based OS such as Mac or other git repository manager such as
Requirements
- You should have
gitalready installed. If this is the not case, you can simply install it with:sudo apt-get update
sudo apt-get install gitYou will use git to actually install your plugin
WP_Mocklibrary and its dependencies from GitHub. - You should have
composerinstalled. In Ubuntu, you can install this easily by:sudo apt-get update
sudo apt-get install composerComposer is used to install third party dependencies that is needed by `WP_Mock` such as
Mockery,phpunitlibrary, etc. - Latest
phpunitlibrary now requires at least PHP 7.0, so make sure you are using this version in your test environment. You can get the PHP version in the command line using:php --version. You should get at least PHP 7.0 on it:~$ php --version
PHP 7.0.27-1+ubuntu16.04.1+deb.sury.org+1 (cli) (built: Jan 5 2018 14:12:46) ( NTS )
Copyright (c) 1997-2017 The PHP Group
Zend Engine v3.0.0, Copyright (c) 1998-2017 Zend Technologies
with Xdebug v2.6.0beta1, Copyright (c) 2002-2017, by Derick Rethans
with Zend OPcache v7.0.27-1+ubuntu16.04.1+deb.sury.org+1, Copyright (c) 1999-2017, by Zend Technologies - You should be connected to the Internet when you integrate
WP_Mockwith your plugin. This is required to fetch all required third party libraries.
Plugin Structure
Assuming you have the following plugin structure:
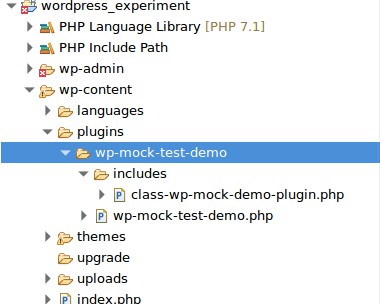
You have a plugin folder called “wp-mock-test-demo“. Under this main plugin folder, you will find the main plugin file wp-mock-test-demo.php and the include folder where the plugin classes are stored.
The above structure is common to many plugin nowadays. Again that’s an example only and its simplified for the sake of this tutorial.
Steps
Now you have all the requirements set, below are the steps to integrate WP_Mock to the above example plugin.
- Create a
composer.jsonfile. Below are the contents of thecomposer.jsonfile for the above test plugin:{
"name": "codex-m/wp-mock-test-demo",
"description": "Basic plugin for demonstrating WP_Mock unit testing integration.",
"authors": [
{
"name": "Emerson Maningo",
"email": "[email protected]"
}
],
"require-dev": {
"10up/wp_mock": "dev-master",
"phpunit/phpunit": "^6.5"
},
"autoload": {
"classmap": [
"includes/"
]
}
}This
composer.jsonshould be located in your main plugin root directory. In the above plugin example, the resulting path of composer.json is/wp-content/plugins/wp-mock-test-demo/composer.jsonExplanation to the above composer.json settings:
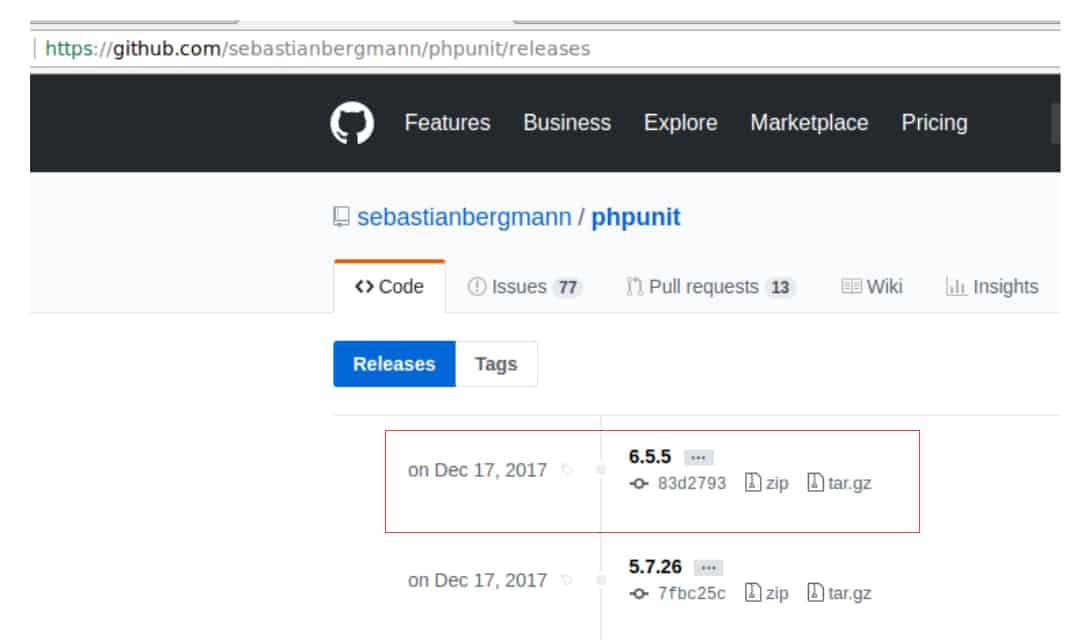
name,description,authorsshould be self-explanatory. Just edit them and put your own values there.10up/wp_mockshould point todev-master, so you will always get the very latestWP_Mockreleasesphpunit/phpunitshould point to the very latest version. Currently (as of January 2018) its6.5and above. You should continually check the phpunit installation page and scroll down to “Composer” section to get the recommended version to use, e.g. screenshot:
You can also check the phpunit release page in GitHub. Example, latest version (as of the time this tutorial is written is 6.5.5):
- Under
autoload -> classmapis where you will put the path of your plugin classes that you need to test. Exampleclassmaphas a value ofincludes/because this is where the sample plugin classes are located. Composer will autoload these classes automatically for testing with phpunit.
- Create
phpunit.xml. Please add this also under your main plugin root directory example at this path:/wp-content/plugins/wp-mock-test-demo/. The following is the code ofphpunit.xmlfor the demo plugin under testing:<phpunit bootstrap="unit-tests/bootstrap.php"
colors="true">
<testsuites>
<testsuite>
<directory prefix="test-" suffix=".php">unit-tests/tests</directory>
</testsuite>
</testsuites>
<groups>
<exclude>
<group>skipped</group>
</exclude>
</groups>
</phpunit>phpunit.xmlis the phpunit configuration file. Based on the above configuration, it tells the following information:- The bootstrap path is in
unit-tests/bootstrap.php - Your test files should be found in
unit-tests/tests
You will be creating these files and directories later on. Take note that since this is a configuration file, it can be customized to fit your own test environment. (e.g. change the path names and test folders,etc.)
- The bootstrap path is in
- According to your
phpunit.xml, you should be creating abootstrap.phpfile under a directory called unit-tests. Create this directory first and then add the bootstrap file inside it. This should be the code of your bootstrap file:<?php
/**
* Autoload the composer items.
*/
require_once 'vendor/autoload.php';The purpose of this script is to auto load the composer items that will be using for your testing. Your
bootstrap.phpshould be found in:/wp-content/plugins/wp-mock-test-demo/unit-tests/. The scriptvendor/autoload.phpwill be automatically created when you finally install the test dependencies with composer later on. - Also according to your
phpunit.xml, you should be creating atestsdirectory under theunit-testsdirectory. So go ahead and create thistestsdirectory. This is where you will put your unit test files later on. - Now you are all set, next step to run composer to install all required dependencies. In the command line, run this command at your plugin root directory:
composer install
The installation can take a while depending on your Internet connection. Wait until all is completed. This installation processes creates new directory called “
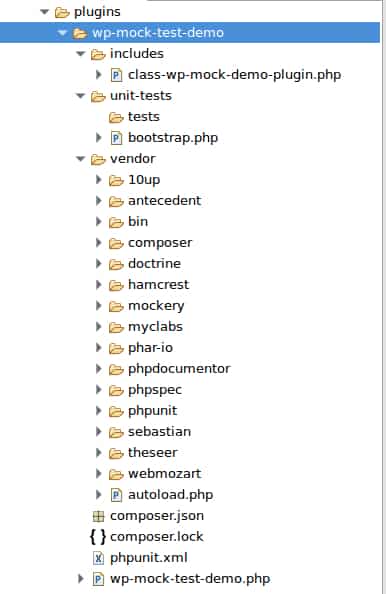
vendor” and there are several sub-directories and files under it.

Now you are all set. This is how the demo plugin structure would look like after completing the above integration and installation of third party libraries for using with your tests.
Writing your first unit test
Once the above installation of the third party dependencies are done with composer. You are now ready to write your first unit test with WP_Mock! Let’s use the above example plugin in writing test. Supposing the plugin class class-wp-mock-demo-plugin.php contains the following code:
<?php
/**
 * WP Mock Demo Plugin Class
 * @author emerson
 *
 */
class WP_Mock_Demo_Plugin {

    /**
     * Init hooks
     */
    public function init_hooks() {
        add_filter( 'document_title_parts',  array( $this, 'append_login_status_to_title' ) , 10, 1 );
    }

    /**
     * Append login status to title
     * @param string $title
     */
    public function append_login_status_to_title( array $title ) {
        if ( is_user_logged_in() ) {
            $title[] = 'USER LOGGED-IN';
         }
        return $title;
    }

}
Based on the class code, there are two methods. The first method init_hooks is meant to initialize plugin hooks. The second method is the callback to the WordPress filter document_title_parts. The objective is to append login status to the title of the WordPress post or pages. Supposing you will test that these two methods works as intended. You will need to write two unit tests:
- Test
init_hooksmethod to ensure that it initialize hooks - Test
append_login_status_to_titleto ensure that it appends the textUSER LOGGED-INto the title tag when a user is logged-in
Finally to write your own unit test:
- Create a PHP file called
test-wp-mock-demo-plugin.phpand save it underunit-tests/tests - Inside this test file, add this default code:
<?php
/**
 * Tests WP_Mock_Demo_Plugin
 *
 */
class Test_WP_Mock_Demo_Plugin extends PHPUnit\Framework\TestCase {
	/**
	 * Setup WP_Mock for each test
	 */
	public function setUp() {
		\WP_Mock::setUp();
	}
	/**
	 * Clean up after the test is run
	 */
	public function tearDown() {
	    $this->addToAssertionCount(
	        \Mockery::getContainer()->mockery_getExpectationCount()
	        );
		\WP_Mock::tearDown();
	}
}
This is your default
WP_Mocktest template file. Every time your add a new test file, start with this template. It consists of adding a basic setup and teardown ofWP_Mocktest. - Now its time to add your actual tests. The following are the complete code of the tests:
<?php
/**
 * Tests WP_Mock_Demo_Plugin
 *
 */
class Test_WP_Mock_Demo_Plugin extends PHPUnit\Framework\TestCase {
	/**
	 * Setup WP_Mock for each test
	 */
	public function setUp() {
		\WP_Mock::setUp();
	}
	/**
	 * Clean up after the test is run
	 */
	public function tearDown() {
	    $this->addToAssertionCount(
	        \Mockery::getContainer()->mockery_getExpectationCount()
	        );
		\WP_Mock::tearDown();
	}
	/**
	 * Instantiate an instance of the class to be tested
	 * @return WP_Mock_Demo_Plugin
	 */
	private function get_subject() {
	    $test_subject = new WP_Mock_Demo_Plugin();
	    return $test_subject;
	}
	/**
	 * @test
	 * Test that hooks are initialized
	 */
	public function it_adds_init_hoooks() {
	    //Get an instance of the subject to be tested
	    $test_subject = $this->get_subject();

	    /**
	     * Ensure the filter added
	     * Documentation https://github.com/10up/wp_mock#mocking-actions-and-filters
	     */
	    \WP_Mock::expectFilterAdded( 'document_title_parts',  array( $test_subject, 'append_login_status_to_title' ) , 10, 1 );

	    //Now test the init hook() method of this class to check if this filter is really added
	    $test_subject->init_hooks();
	}
	/**
	 * @test
	 * Test that it appends USER LOGGED-IN to title when user is logged-in
	 */
	public function it_appends_user_loggedin_to_title() {
	    //Get an instance of the subject to be tested
	    $test_subject = $this->get_subject();

	    /**
	     * Mock 'is_user_logged_in' WordPress core function
	     * Documentation: https://github.com/10up/wp_mock#mocking-wordpress-core-functions
	     */
	    \WP_Mock::userFunction( 'is_user_logged_in', array(
	        'times' => 1,
	        'return' => true
	    ) );

	    //Mock original title
	    $original_title = array();
	    $original_title[] = 'Original title';

	    //Set expected result
	    $expected_result = $original_title;
	    $expected_result[] = "USER LOGGED-IN";

	    //Now test the append_login_status_to_title() to make sure that filters title and appends USER LOGGED-IN text
	    $filtered_title = $test_subject->append_login_status_to_title( $original_title );

	    //Now let's assert that the filtered title is one we expected.
	    $this->assertSame( $expected_result, $filtered_title );

	}

}
Please read the code comments in the test for details. Explaining this is beyond the scope of this tutorial. For more information, please refer to these following documentations:
WP_Mock Basic Usage
PHPUnit Assertions
Running your unit test
To run the test, execute this at the terminal:
./vendor/bin/phpunit --configuration phpunit.xml
The test results will be shown like the one below:
$ ./vendor/bin/phpunit --configuration phpunit.xml
PHPUnit 6.5.5 by Sebastian Bergmann and contributors.

..                                                                  2 / 2 (100%)

Time: 31 ms, Memory: 6.00MB

OK (2 tests, 3 assertions)
Download the sample demo plugin
You can get the sample demo plugin used in this tutorial in GitHub: https://github.com/codex-m/wp-mock-test-demo
Leave a Reply