How to install or update Eclipse PDT (PHP Development Tools ) to latest version in Ubuntu 16.04 | 18.04 LTS
Eclipse is an open source IDE that can used for PHP development. This tutorial shows how to install and update Eclipse in latest Ubuntu 16.04 | 18.04 LTS. This tutorial is tested on Ubuntu 16.04. But these concepts apply to a recent Ubuntu 18.04 LTS and beyond.
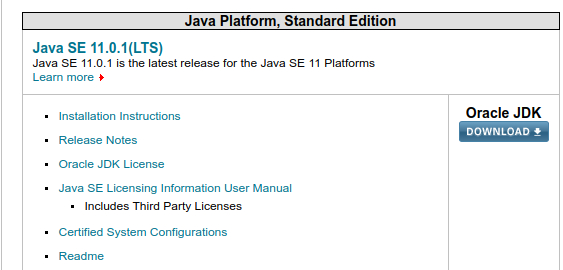
Install latest Java version first
To get the speed benefits of using Eclipse, you need to update to the latest Java version. This is recommended if you are updating or installing Eclipse.
Update your computer software to the very latest version. If you are using LXDE/Lubuntu, this is usually done in Menu -> Software Updater.
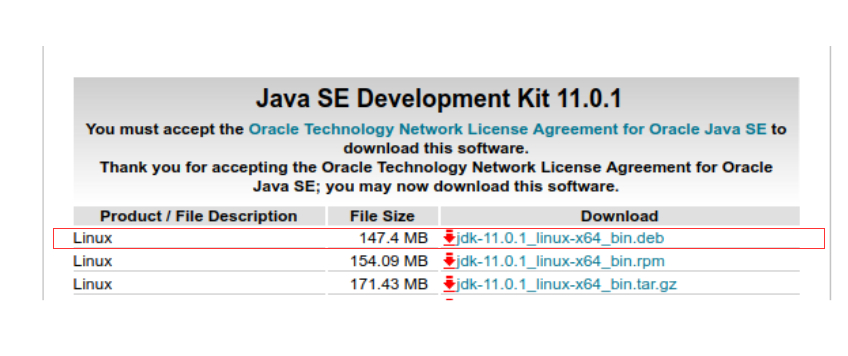
It’s very important to use the correct version that corresponds to your Java installer version. For example, jdk-11.0.1. If you are using jdk-11.0.2 then, it should be sudo update-alternatives –install /usr/bin/java java /usr/lib/jvm/jdk-11.0.2/bin/java 2
Then run this command also:
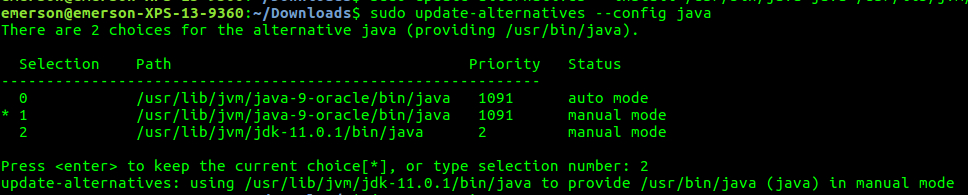
sudo update-alternatives --config java
This will auto-detect all Java installations in your computer including the latest version installed. You need to use the latest version and ignore the rest so make sure to type the number that corresponds to the latest version ( #2 in my case) see screenshot.
Finally run these 3 commands in a row ( make sure to use the correct version in the paths that corresponds to the version you installed). e.g. 11.0.1 in my case.
sudo update-alternatives --install /usr/bin/jar jar /usr/lib/jvm/jdk-11.0.1/bin/jar 2
sudo update-alternatives --install /usr/bin/javac javac /usr/lib/jvm/jdk-11.0.1/bin/javac 2
sudo update-alternatives --set jar /usr/lib/jvm/jdk-11.0.1/bin/jar
Finally check java version as follows:
java -version
You should get something like: It will show as java 11.0.1. Then you have it correctly installed!
java 11.0.1 2018-10-16 LTS
Java(TM) SE Runtime Environment 18.9 (build 11.0.1+13-LTS)
Java HotSpot(TM) 64-Bit Server VM 18.9 (build 11.0.1+13-LTS, mixed mode)
Installing Eclipse
Now Java is updated, you need to install Eclipse:
IMPORTANT: This procedure should only be used when Installing Eclipse for the first time. This procedure should not be used for updating Eclipse.
Once downloaded, right click on the package and click “Extract Here.”. A folder named as eclipse-installer will be extracted.
Open a terminal and navigate to your Downloads directory where the Installer is downloaded and extracted. Run this command to go inside the Installer folder:
cd eclipse-installer
Run this command:
./eclipse-inst
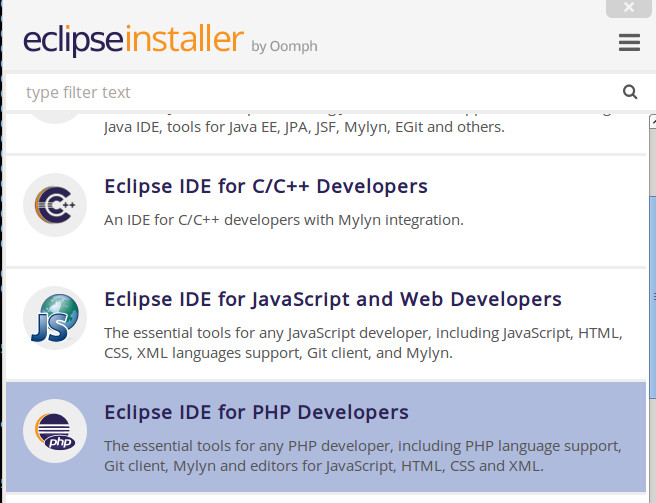
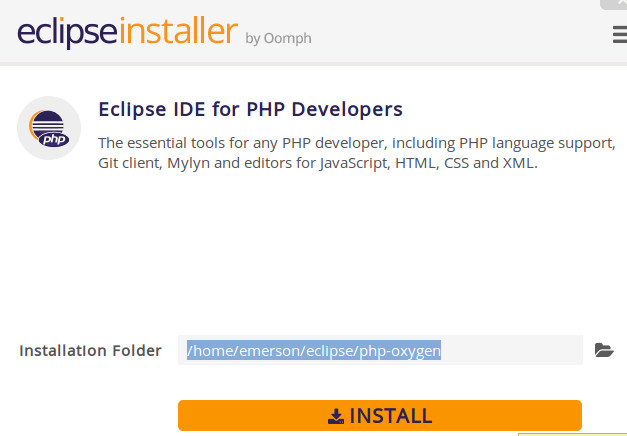
Select “Eclipse for PHP developers” and confirm that you are installing at your preferred path (usually home directory) and then click Install
It will take some time to download the package depending on your Internet connection. Also if it ask you to accept certificates, go ahead and check all of those then accept.
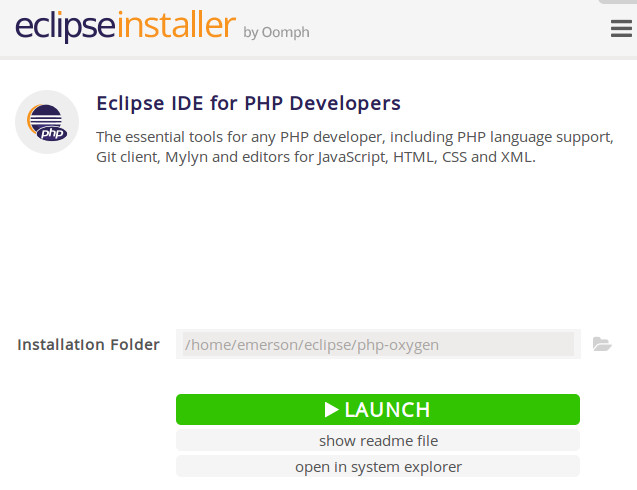
Finally once its installed, you should be able to see the Launch button:
Adding Eclipse Icon to Menu -> Programming
It would be useful to have Eclipse Icon under “Programming” such as below:
Create a text file
Paste the following content below:
[Desktop Entry]
Encoding=UTF-8
Version=1.0
Type=Application
Name=Eclipse IDE
Comment=Eclipse Integrated Development Environment
Icon=/home/replace_with_your_ubuntu_username/eclipse/php-oxygen/eclipse/icon.xpm
Exec=/home/replace_with_your_ubuntu_username/eclipse/php-oxygen/eclipse/eclipse
StartupNotify=true
Categories=Development
StartupWMClass=php-oxygen
Save it as eclipse.desktop
Copy this file to /home/replace_with_your_ubuntu_username/.local/share/applications/ directory
It will now appear under “Programming” section in your Ubuntu menu.
Updating Eclipse
To update Eclipse, the following are the procedures:
Launch your older version of Eclipse.
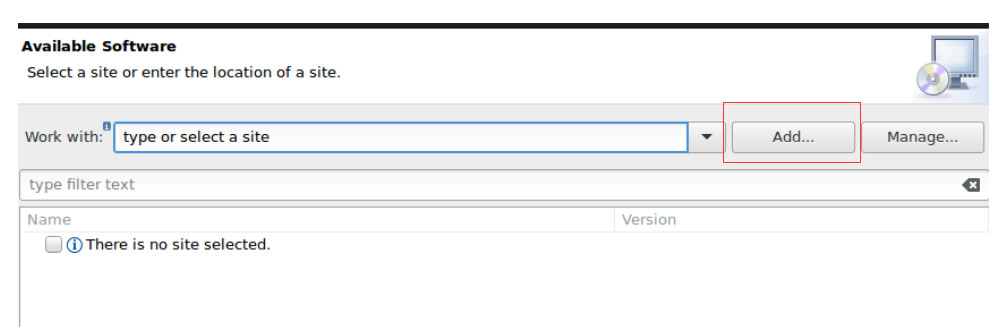
Go to Help -> Install New Software
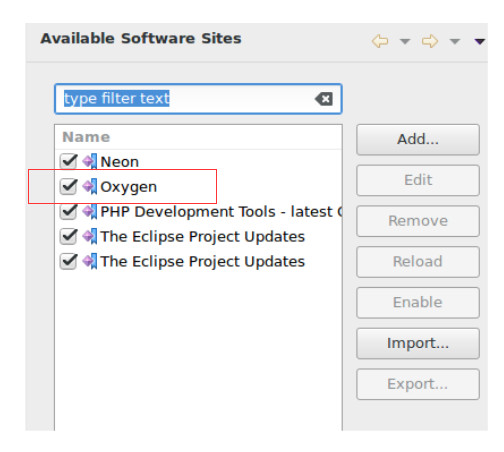
Under Available software, click Add
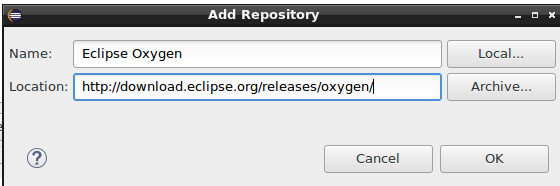
Enter the name and the URL of the repository, e.g.
Under release name, find the current release (“Oxygen” as of the time this post is written). Then click P2 Repository.
Click OK and then wait until its finished loading contents. You can click cancel and don’t install anything for now. Then restart Eclipse.
Once restarted, go again to Help -> Install New Software -> click “Manage”, you should see something like “Oxygen” latest release being added there.
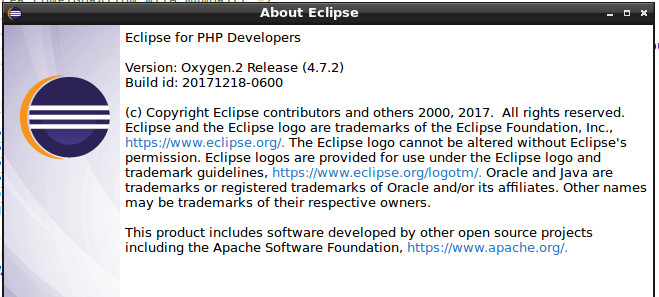
Finally go to Help -> Check for Updates. Complete this process and it may time depending on the speed of your Internet connection. At the end of this process, you will have your Eclipse updated. You can see this in Help -> About Eclipse after restarting.
Known issues
If after installing Eclipse using Installer wizard then clicking the “Launch” button. You will see this error:
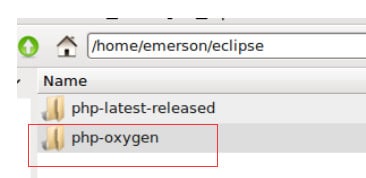
This is usually caused by wrong Eclipse update procedure. The solution is to simply go to /home/eclipse/ directory. Find the latest directory that is created there. This is usually the Eclipse folder that you have just installed that is providing an error.
Delete the just newly installed Eclipse directory (inside the red box in the screenshot below) and leave your old Eclipse installation intact:
Once deleted, you can follow the Eclipse update procedure above.
This website uses cookies to improve your experience. We'll assume you're ok with this, but you can opt-out if you wish.AcceptRead More
Privacy & Cookies Policy
Privacy Overview
This website uses cookies to improve your experience while you navigate through the website. Out of these, the cookies that are categorized as necessary are stored on your browser as they are essential for the working of basic functionalities of the website. We also use third-party cookies that help us analyze and understand how you use this website. These cookies will be stored in your browser only with your consent. You also have the option to opt-out of these cookies. But opting out of some of these cookies may affect your browsing experience.
Necessary cookies are absolutely essential for the website to function properly. This category only includes cookies that ensures basic functionalities and security features of the website. These cookies do not store any personal information.
Any cookies that may not be particularly necessary for the website to function and is used specifically to collect user personal data via analytics, ads, other embedded contents are termed as non-necessary cookies. It is mandatory to procure user consent prior to running these cookies on your website.


Leave a Reply